

Teacher guide · beginner
Set up your first course
Create a course with its term and class sections, then add your first students.
5 minute read · Last reviewed
Before you start
- A LogBook teacher account with your profile saved.
Steps
1. Name the course
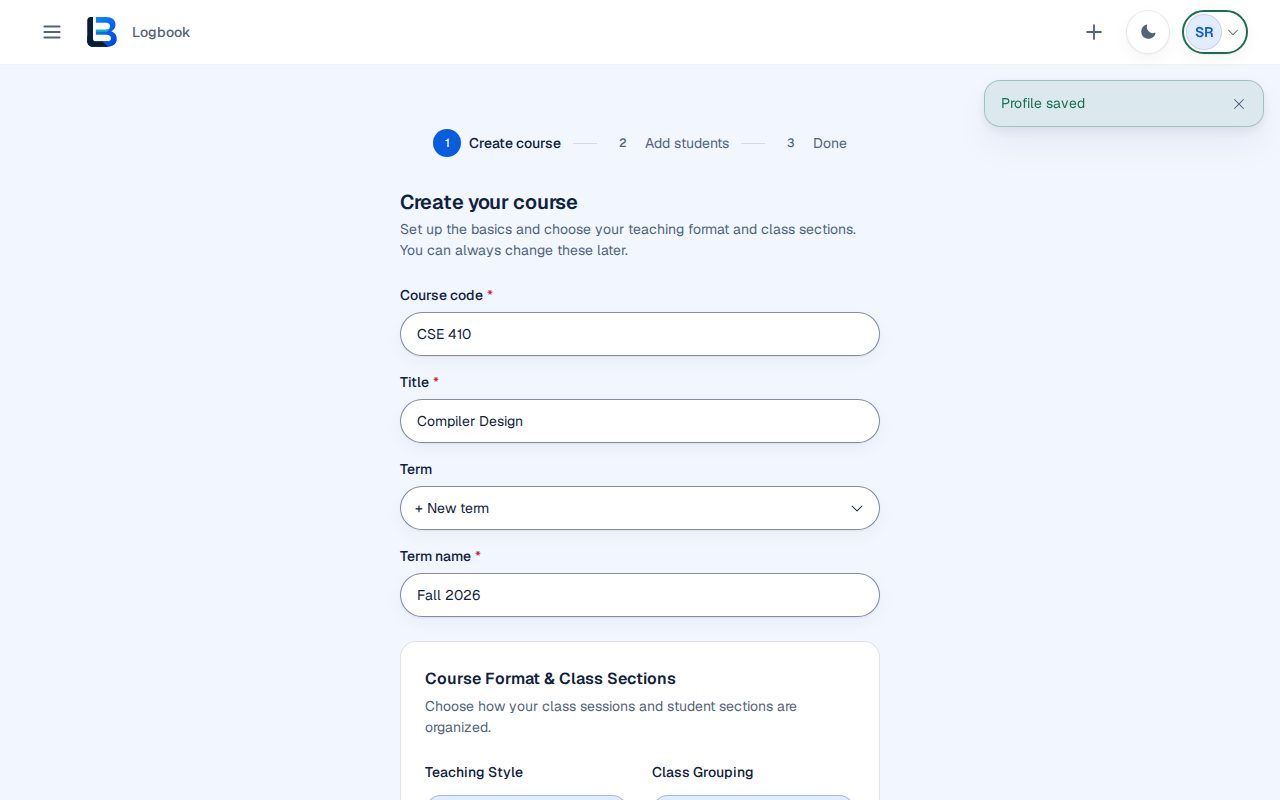
On Create your course, enter the course code and title. Under Term, pick an existing term or choose + New term and type its name, such as Fall 2026.
2. Choose the format
Under Course Format & Class Sections, choose Theory or Lab / Studio, then Single Class Section or Multiple Sections / Groups. If you choose multiple sections, name each one. Select Next.
3. Add your students
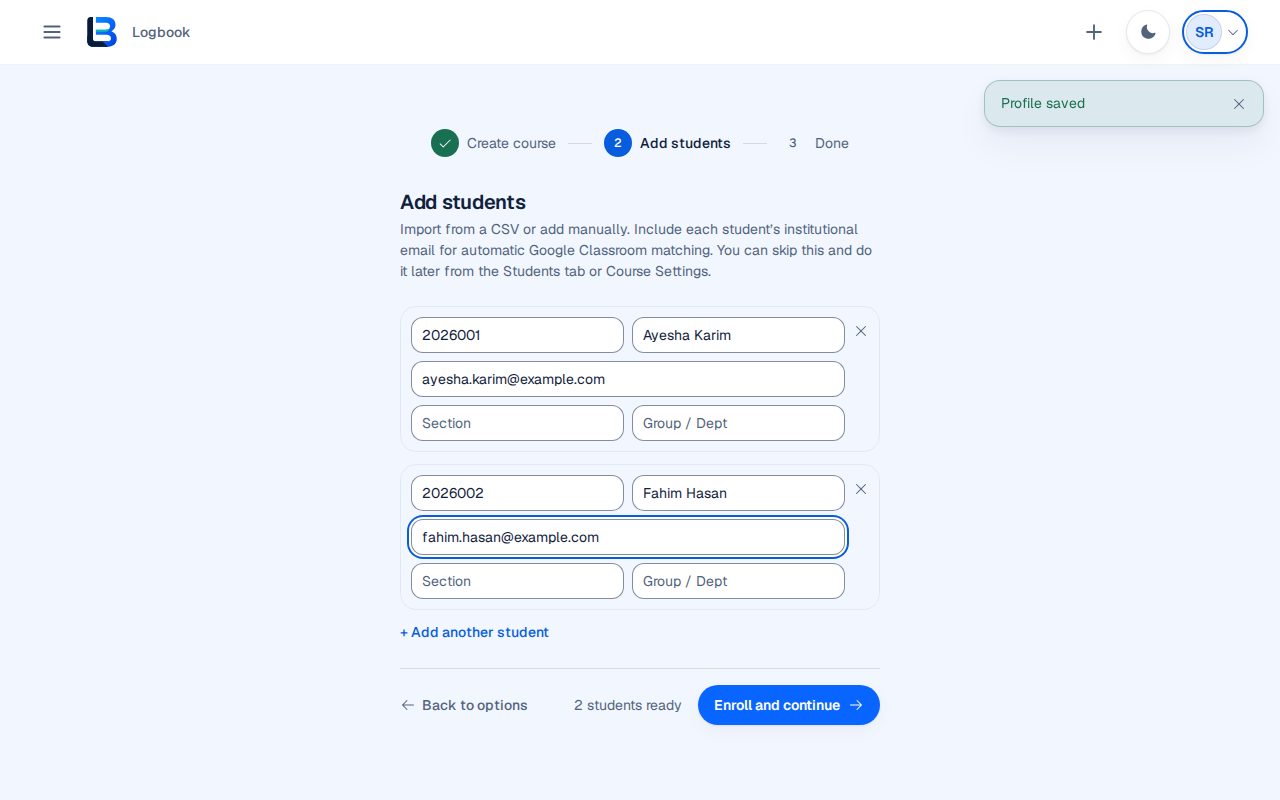
Choose Upload CSV to import a class roster file, or Add manually to type each student's ID, full name and institutional email. Section and group are optional. Use + Add another for more rows, check the count of students ready, then select Enroll and continue.
4. Open the course
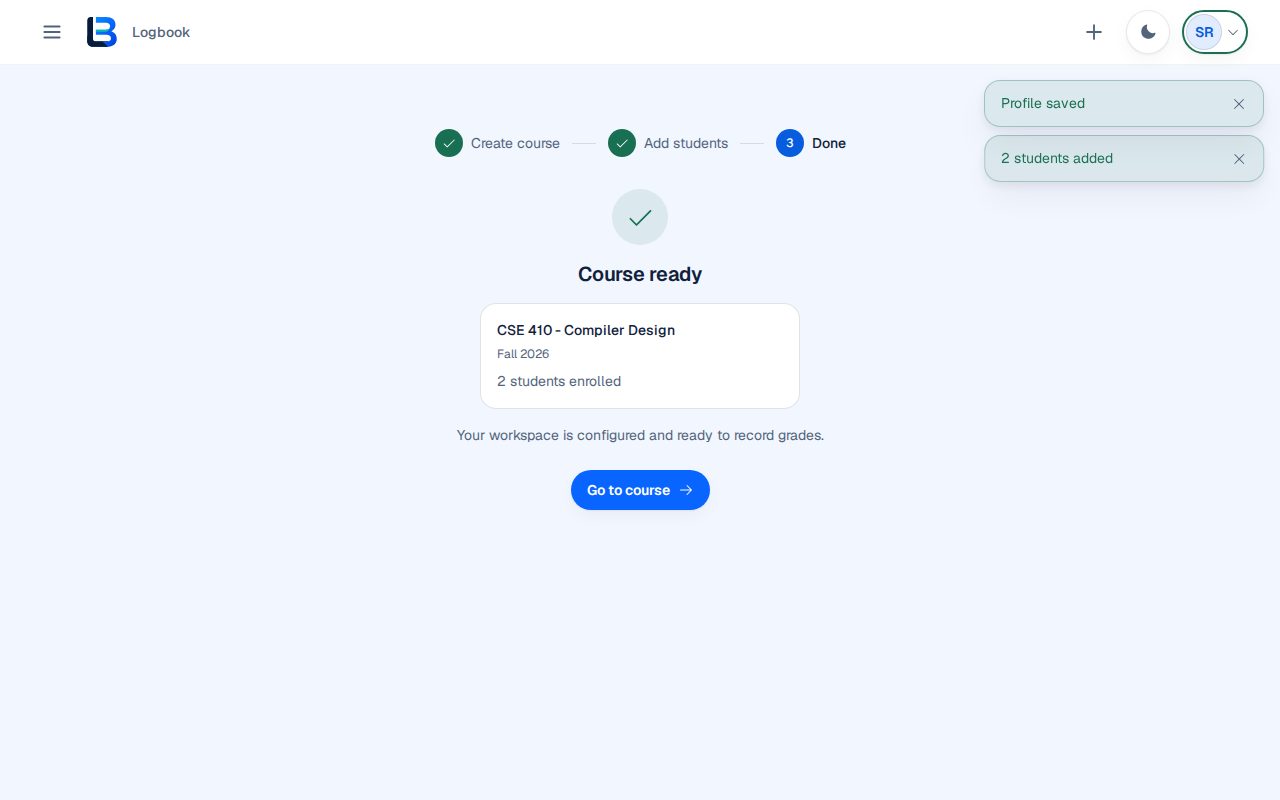
Course ready confirms the course and how many students were enrolled. Select Go to course. The course tabs are Stream, People, Gradebook, Attendance, Schedule, Grading Scheme, Settings, Email and Export.
Expected outcome
The course opens with its term, sections and the students you enrolled.
Troubleshooting
- Next stays disabled on Create your course.
- Enter both the course code and the title, and choose or name a term.
- A student row is not counted as ready.
- Each student needs an ID and a full name, and an email must be a valid address if you enter one.
Related guides
This guide is based on the release recorded above. If the interface differs, stop and follow the current in-product guidance.