

Teacher guide · intermediate
Import a student roster
Upload a CSV class list, map its columns, review the preview and read which rows were skipped and why.
5 minute read · Last reviewed
Before you start
- A course workspace and a CSV file with a header row.
Steps
1. Open the roster
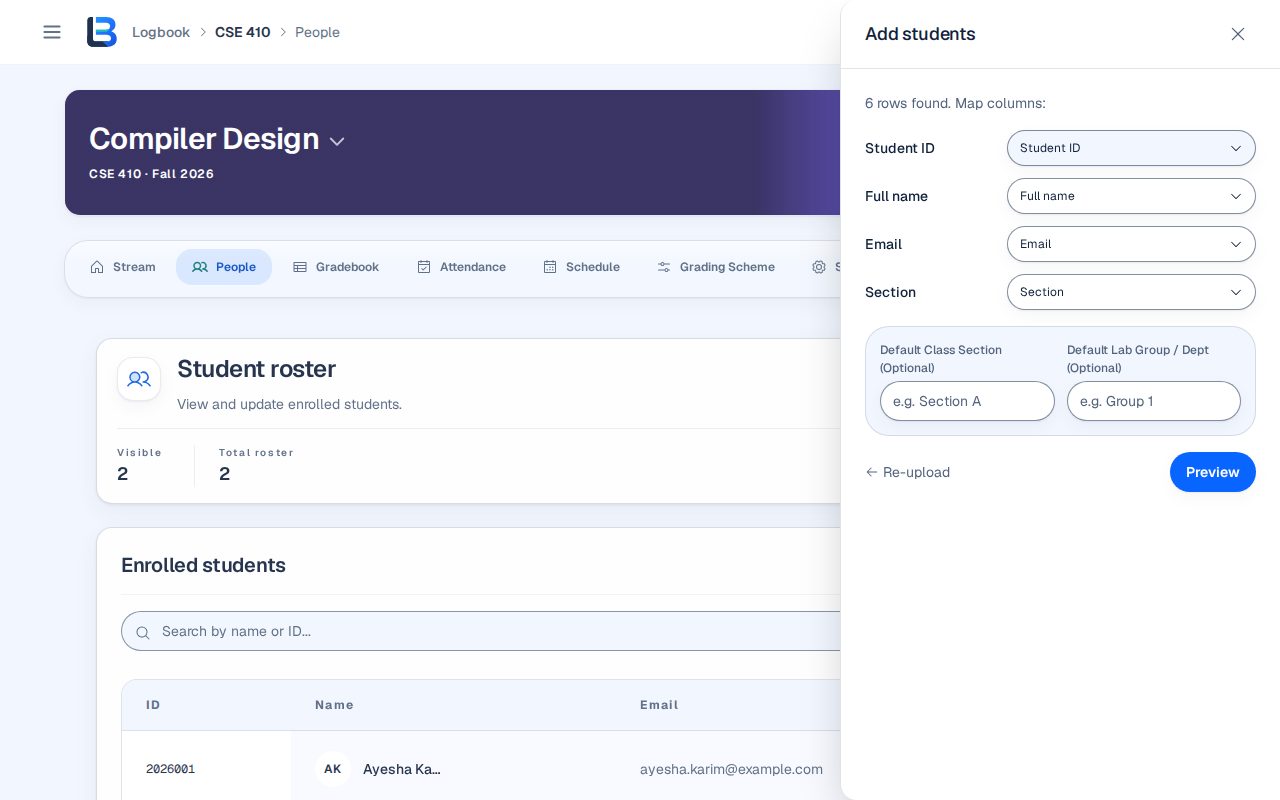
Open the course People tab and choose Import students, then Upload CSV. Choose your .csv file.
2. Map the file
LogBook reads the header row and suggests a mapping for each column: Student ID, Full name, Email, Section, Group / Department, or Skip. Student ID and Full name must be mapped. You can set a default section or group for rows that leave it blank.
3. Review the preview
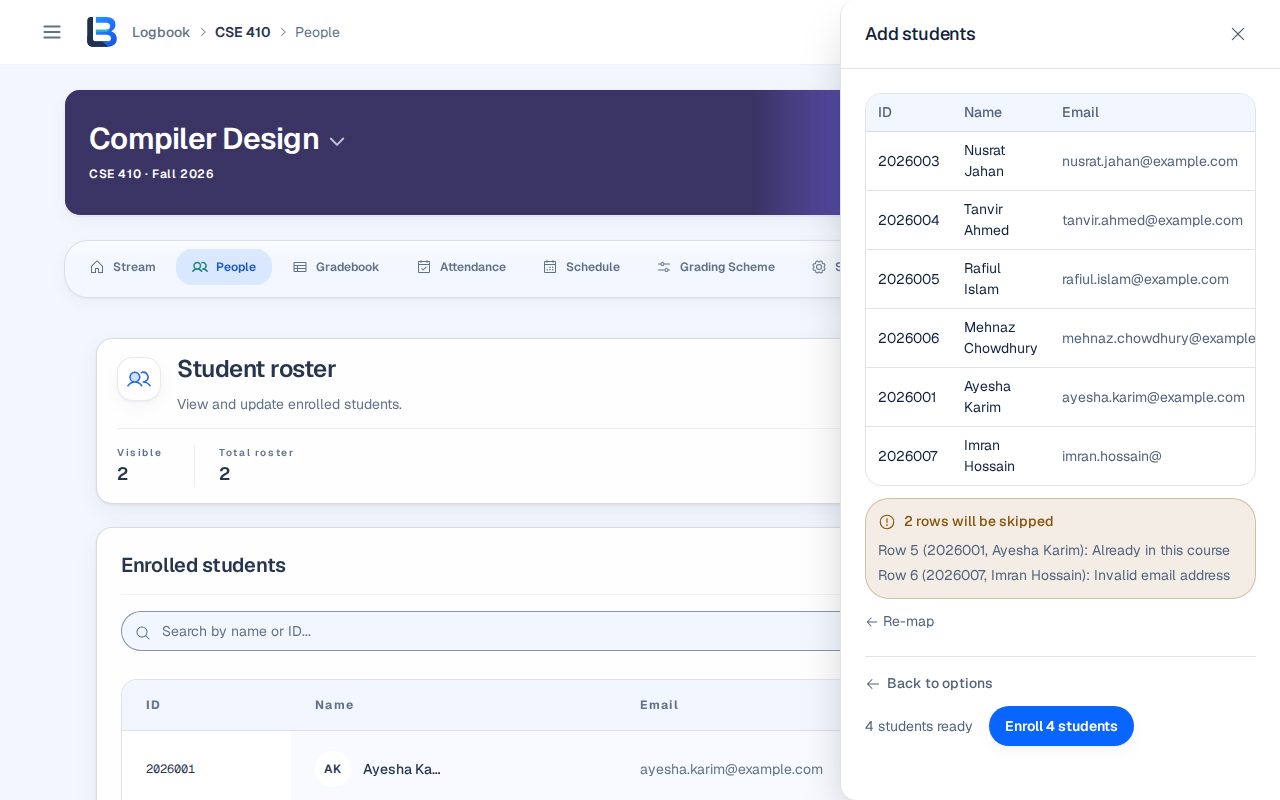
Select Preview to see the rows as they will be saved. Rows with a missing name or ID, an ID already in the course, an ID repeated in the file, or an invalid email are skipped, and the preview lists each one with its reason.
4. Read the result
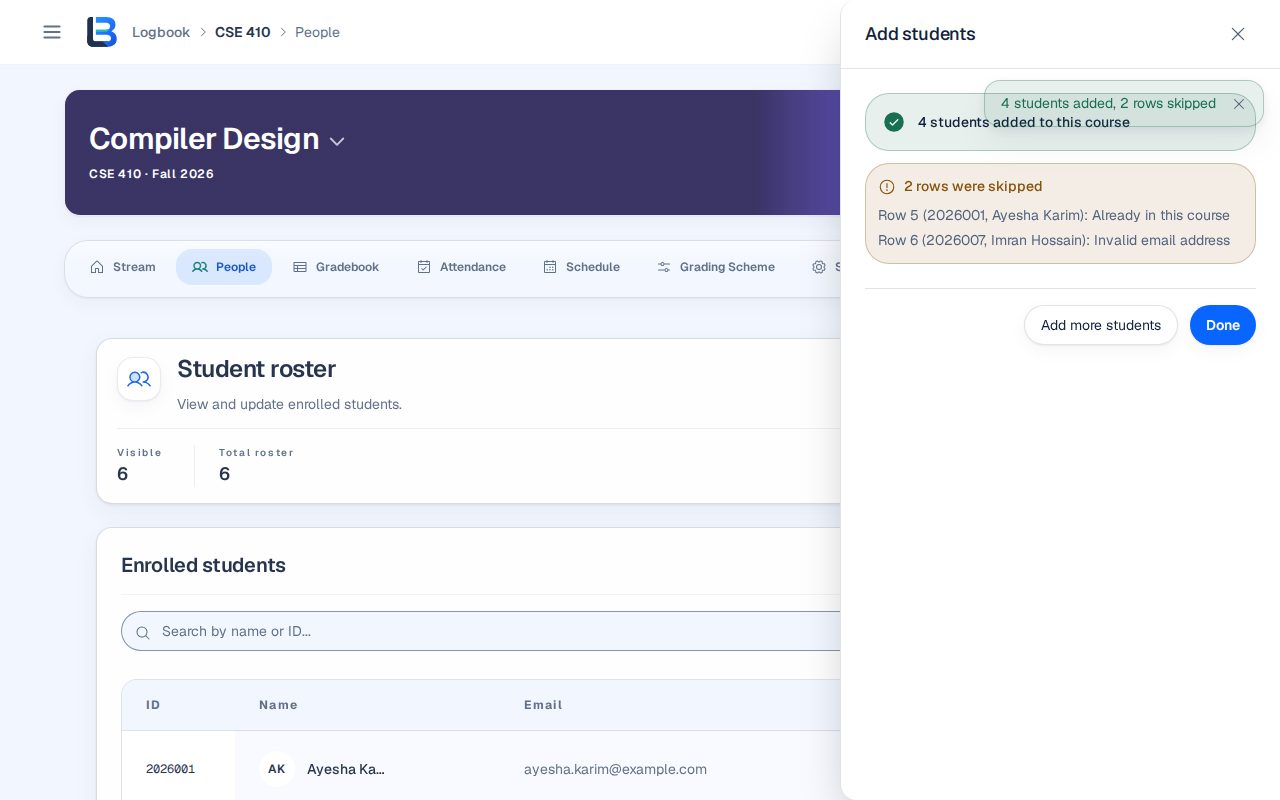
Select Enroll to save the valid rows. The result panel shows how many students were added and lists each skipped row with its reason. Choose Add more students to import again, or Done to close.
Expected outcome
Only valid rows are added to the course roster, and every skipped row is listed with its reason.
Troubleshooting
- A row was skipped for a missing identifier, a repeated or existing ID, or an invalid email.
- Correct that row in the file and import it again; rows that were already added stay in the roster.
- Preview is disabled.
- Map one column to Student ID and one to Full name.
- The file shows no columns.
- Save the class list as CSV with a header row, then choose Re-upload.
Related guides
This guide is based on the release recorded above. If the interface differs, stop and follow the current in-product guidance.